Sunday, August 28, 2011

Wedding projects part 4


I really wanted some fun shoes. I kept looking for green or purple shoes, but the only ones I found had crazy high heels (no thank you!) or were super ugly. So I ended up settling on some simple silver satin low heels.

They were fine, but the more I thought about it, the more I wanted them to be a little more fun & sparkly. So with a little bit of green netting & some Swarovski crystals, I made my wedding shoes one-of-a-kind!


Photos by Mia Jade Photography.

Monday, August 15, 2011

Wedding projects part 3

Originally, I had planned to make white roses for all of the guys boutonnieres. I actually did make all the roses - and then someone pointed out that the roses were a little big. It turned out that the white sweater that I was working with was just too thick to look 'right' on a suit. At this point, my favorite thrift stores weren't selling sweaters anymore, and I was running low on time.


So I changed it up to calla lillies instead. Here, the thickness of the sweater was an asset instead of a problem. Again, I added a sprig of Lilly-of-the-Valley to the flowers for our dads and for my husband(!).


One of the best parts was that I got to hand them out to our dads & grandad at our rehearsal dinner as a gift! And, my mother-in-law had all of the groomsmen's flowers the night before - I didn't have to worry about delivery or wilted flowers!


More awesome photos by Mia Jade Photography.

Tuesday, August 9, 2011

Wedding projects part 2


The next project I tackled was corsages for our moms & grandmas. I looked at lots of pictures online to try to get inspiration, but ultimately decided to just do one big flower in the same style that I make for pins, just bigger.
Everyone said that they wanted a wrist corsage, so I had to find a base. Fortunately, I know the awesome people over at Market Blooms at the North Market here in Columbus. They were kind enough to let me look through a florist catalog and find some fabulous 'pearl' bracelet bases! (I had no idea that there were so many options - I thought I'd end up with an elastic band, like I got for prom.)


I made all of them in one of the purples that I used for my bouquet, with just a little sparkle in the center. I used green ribbon to create some leaves - I didn't want the corsages to be to hot!
I also added some of the lily-of-the-valley to the moms corsages. I'm so happy with the way they turned out!


Thursday, August 4, 2011

Wedding projects part 1

Shockingly enough, I didn't manage a post before my wedding. While I'm sad about that, I'm really happy to be done with wedding planning - and happy that I didn't kill anyone during the process.
All in all, it was an awesome wedding. It would have been hard to tell that we switched our ceremony from outside to inside a scant 2 hours before we were scheduled to start. Everyone had a great time and loved all of the little things that made the wedding very 'us.'

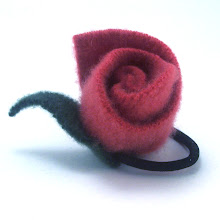
One of the first projects I worked on for the wedding was making my bouquet, and bouquets for my four lovely best women. This was also my most time-consuming project, but fortunately I was able to start in January. First I made the roses out of recycled sweaters. I used 3 shades of purple, white, and green. My bouquet has 20 flowers, and each of my girls bouquets had 10, so that took some time.
Then I attached each rose to a 'stem' of aluminum sculpture wire, and sewed on a green base. I didn't cover the whole wire, just about 3 - 4 inches.


For my girls, I ended up creating some leaves in a citrus-y green, and wiring them with floral wire. For my bouquet, I was lucky enough to be able to incorporate some faux lillies-of-the-valley that my mom had pinned to her wedding dress.

I also decided that I wanted just a bit of sparkle, so I wired some clear Czech crystals onto copper beading wire. I wrapped all of them in the same style, with a heavy white brocade-type material and tied with a thin spring green ribbon.
I spent a crazy amount of time working on these, but I love them! Plus, now I get to keep it forever as a work of art.


Photos were taken by the fabulous Mia Jade Photography.

Sunday, April 17, 2011

Poor neglected blog ...

So, I see that my last post was August 9th, 2010. Let me tell you why, and then we can try to start fresh.

On August 15th, my partner in rain barrel installation (and in everything else) proposed! While we had been talking about it for quite some time - and had looked at rings together - he caught me completely off guard.
On August 16th, I was hired as an elementary art educator for an amazing school in a district that truly values the arts. (As opposed to my last district, who cut art, music & PE for their K-6 students after levy failures, leaving me unemployed for a year.)

So good news all around - happily engaged, happily employed - but incredibly busy. Planning a wedding is not the easy thing that I had imagined or hoped for! Not surprisingly, there are lots of projects that I want to make myself. (More on these in future posts.)
Also, my job - while completely amazing - has consumed huge amounts of time. I have about 550 students in grades 1-5 that I see on a four day rotation. I have a great room all to myself (with windows, even!) that needed to be cleared out after 20+ years of occupancy by the previous teacher. I am still finding random things here and there, trying to consolidate and organize so that I know where everything is.

Hopefully, I'll be back soon - with pictures! - of some of the projects I've been working on.

Monday, August 9, 2010

Recycled Wine Bottle Torch


I want to make these for my own backyard!! Our current torches are wretched, useless things, and these wine bottles are so much more attractive.

Full disclosure: this post is a shameless steal from Erik Anderson. You can read his complete post (with assembly instructions) here: http://www.gerardotandco.com/blog/recycled-bottle-torch/


Recycled Wine Bottle Torch How To

Materials Needed:

1. Empty Wine Bottle (You can use any bottle you like as long as it’s glass and the neck is 1” in diameter. Be clever!)
2. Teflon Tape 1/2”
3. Copper Top Plate Connector (threaded for 3/8”-16 thread rod)
4. 1” Split Ring Hanger (threaded for 3/8”-16 thread rod)
5. 1/2” x 3/8” Copper Coupling
6. 1/2” Copper Cap
7. Two Hex Nuts (threaded for 3/8”-16 thread rod)
8. Two #10 x 1” Zinc Plated Wood Screws (if you’re mounting it to wood)
9. 3/8”-16 Zinc Plated Threaded Rod (I bought a 3’ rod and cut it down to 8, 4-1/2” rods with a hacksaw.)
10. Tiki Replacement Wick
11. Torch Fuel (For safety reasons, only use fuel made specifically for outdoor torches. i.e. Tiki brand)


Safety Note: This is for outdoor use only. Tiki brand recommends that the wick never be set higher than 1/4-inch, and I recommend that you exercise the same discretion and common sense that you would with any small open flame. Never leave your torches unattended.

Wednesday, July 7, 2010

A few new bags ...

... all with an interior zipper pocket!


Hope you like them as much as I do.