Showing posts with label ecofriendly. Show all posts

Monday, August 15, 2011

Wedding projects part 3

Originally, I had planned to make white roses for all of the guys boutonnieres. I actually did make all the roses - and then someone pointed out that the roses were a little big. It turned out that the white sweater that I was working with was just too thick to look 'right' on a suit. At this point, my favorite thrift stores weren't selling sweaters anymore, and I was running low on time.


So I changed it up to calla lillies instead. Here, the thickness of the sweater was an asset instead of a problem. Again, I added a sprig of Lilly-of-the-Valley to the flowers for our dads and for my husband(!).


One of the best parts was that I got to hand them out to our dads & grandad at our rehearsal dinner as a gift! And, my mother-in-law had all of the groomsmen's flowers the night before - I didn't have to worry about delivery or wilted flowers!


More awesome photos by Mia Jade Photography.

Tuesday, August 9, 2011

Wedding projects part 2


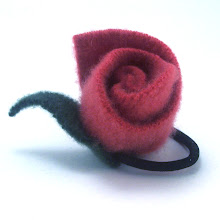
The next project I tackled was corsages for our moms & grandmas. I looked at lots of pictures online to try to get inspiration, but ultimately decided to just do one big flower in the same style that I make for pins, just bigger.
Everyone said that they wanted a wrist corsage, so I had to find a base. Fortunately, I know the awesome people over at Market Blooms at the North Market here in Columbus. They were kind enough to let me look through a florist catalog and find some fabulous 'pearl' bracelet bases! (I had no idea that there were so many options - I thought I'd end up with an elastic band, like I got for prom.)


I made all of them in one of the purples that I used for my bouquet, with just a little sparkle in the center. I used green ribbon to create some leaves - I didn't want the corsages to be to hot!
I also added some of the lily-of-the-valley to the moms corsages. I'm so happy with the way they turned out!


Tuesday, May 11, 2010

Rain Barrel Part 3: The Watering System


So the rain barrel is set up and ready to use! The final challenge of installation was to make an easy to use, practical system to water our vegetable garden. So in addition to the rain barrel, I also bought a hose splitter and 2 pre-measured lengths of drip tape.

The tricky part? Getting hoses the right length to carry the water from the rain barrel to the start of the raised beds. Fortunately, the hardware store has all kinds of neat tools and tricks.

I needed 2 lengths of garden hose - 1 about 7 ft, the other around 14. I bought one 25 ft hose and two hose end replacements, one male and one female. *Make sure you are buying the same size of hose and replacement parts!!*


Next, I cut the hose to the right length. It's important to make this cut as straight as possible!

Wiggling the hose replacement part into place is a little tricky, but it can be done! Remember to put the outer part (silver in these pictures) onto the hose first! Otherwise, you'll have to smack yourself in the head - just like I did.


Tighten up the screws, and you should be ready to go!


The great thing about the drip tape system is that we can turn it on and walk away for an hour. Our plants will get a slow, steady & gentle watering, and we won't be watering anything we don't need to be (like the weeds between the raised bed and our fence.)


Big thanks to The Rain Brothers for delivering my rain barrel and giving lots of advice! If you live in the Columbus area, I highly recommend them!
http://www.rainbrothers.com/

Sunday, April 25, 2010

Rain Barrel Installation: Building a Stand


It's a beautiful Sunday morning in my backyard - the birds are singing, the lilacs smell amazing - and I can see our newly installed rain barrel. While it was a big project, now that it's all done, I feel that I can say that most people would be able to get this done with a little help from a friend. Doing a project together is always more fun than going it alone anyway.

So, the first step to installing a rain barrel is building a stand - unless you live on a hill. Since rain barrels have no water pressure, elevating them uses gravity to push water through the hose. We decided to make our stand about 2 ft high.


Supplies:
1 - 4" x 4" x 8'
2" x 4" (we have a bunch of these that were used for a project & then disassembled. We ended up using about 28' worth.)
Outdoor rated screws - 3" long
Wood stain/treatment - we used a color called Canyon Brown
Table saw
Drill/screwdriver
Paintbrush
Measuring tape
T-square (or something that helps you see when things are at nice 90 degree angles)

Unfortunately, Lowe's can't cut 4" x 4"s. We used our table saw, but quite possibly you could find a local lumber yard that would be willing to help you out for a small fee.

First, we built the base. Obviously, the 4" x 4"s were the legs.


We left the front bottom open because eventually, overflow from the gutter will end up coming out there. Our cuts weren't perfectly straight, but they were close enough. Even though we used our angle checker thing-a-ma-bob, we still had to tweak it a little - but that was easy enough.


Then we added the top. We left spaces in between the 2" to keep the weight down a little, and to keep water from puddling up on top. I'm sure you could use 1" x 4"s instead, we just have the 2"x 4"s already, and we like to reuse.


Finally, we stained the whole thing - we want it to be pretty water-resistant & last a long time, so we covered the stand pretty thoroughly.
Huge thanks to Steve for all of his work on this project. He is patient & thoughtful, and I couldn't ask for a better partner for any kind of project!

Up next: Installing the rain barrel!

Friday, April 2, 2010

An eco-tip that's a little ... batty.


Yesterday, my honey and I installed a bat box! (And by 'I', I mean that I handed him tools while he was 10 ft. up on the ladder.) We are really excited about this because in past summers, our yard has been overtaken by mosquitoes. Since we live in an urban area, it's hard for us to control things (like standing water) that encourages mosquito breeding.

A few bat facts ...
Most US bats eat insects. A single bat can eat up to 1,200 mosquitoes in one hour.
Fewer than 0.5% of bats have rabies. Since 1960 there have only been 40 reported cases of humans getting rabies from bats.
Bats like to come out to eat at night around dusk. Bats flight pattern is much more erratic than birds so look for this pattern.

We bought our bat house at Lowe's, but there are plans to help you build your own! Here's a link to several plans: http://www.eparks.org/wildlife_protection/wildlife_facts/bats/bat_house.asp

Tuesday, March 16, 2010

Eco Tip #3! Recycled Paper Products

Conventional paper products use massive quantities of trees! Here's the facts on replacing virgin fiber products with recycled:

Toilet Paper
If every household in the United States replaced just one roll of virgin fiber toilet paper (500 sheets) with 100% recycled ones, we could save 423,900 trees.

Facial Tissue
If every household in the United States replaced just one box of virgin fiber facial tissues (175 sheets) with 100% recycled ones, we could save 163,000 trees.

Paper Towels
If every household in the United States replaced just one roll of virgin fiber paper towels (70 sheets) with 100% recycled ones, we could save 544,000 trees.

Napkins
If every household in the United States replaced just one package of virgin fiber napkins (250 count) with 100% recycled ones, we could save 1 million trees.

Of course, cloth hankerchiefs, rags, sponges, and cloth napkins are even better than recycled paper - but there are some messes you just don't ever want to think about washing off a rag. (I'm sure other pet owners know what I mean.)

Easy to find brands (using at least 60% PCW (post-consumer waste) and processed chlorine-free(PCF)): Whole Foods 365, Trader Joe's, CVS Earth Essentials, & Seventh Generation.

Friday, August 28, 2009

Mmmm . . . shopping


Ok, so I completely broke my self-imposed ban on new fabrics - but I really need some fresh inspiration, and by inspiration, I mean some quality shopping time at my favorite thrift stores.

See something you like? let me know if you want to call 'first dibs' on any bag I make using a certain fabric or belt!

Monday, July 27, 2009

Columbus Waste Not Center


This place is such a great resource for artists and teachers - and a great place for the community to donate usable but unwanted supplies.

Monday, July 20, 2009

Etsy Trashion Summer Sale and Giveaway!

I'm offering 10% off all purses, bags, and zippy pouches this week!


Summer Sale & Giveaway
The Etsy Trashion Team is having a Summer Sale and Giveaway
to promote Environmental Awareness!

For just one week... July 20 – 27
.
Click to find participating Trashion Team Etsy shops
To save on fine and funky upcycled goods.

To enter the giveaway, visit one of our participating shops
then click to comment on an item in the original summer sale post

http://etsytrashion.blogspot.com/
You may make up to five entries.

Or…Make purchases in participating shops to receive
additional chances for every $10 you spend!

The prize winner will be randomly selected on July 28th.


Saturday, July 4, 2009

Artisan Sundays

Tomorrow is my July Artisan Sundays show at the North Market. I love this show for a few reasons - the first being that I've spent an a lot of time there over the years, hanging out on Saturday mornings, enjoying breakfast (or dessert), and spending a little QT with my parents. I also love having a consistent place to show my work, and getting to chat with the other fun vendors, particularly Amy N., of Sweet Stella Designs, who is my consistent neighbor.

Basically, I love the North Market. It's one of those amazing and unique things about Columbus that few non-Columbus-ite would ever suspect that this town is cool enough to have/support.

Monday, June 29, 2009

My new Studio


Mmmmmm . . . belts!


Here it is in all its glory - my happy little studio space.